Collage to Stitch using AYAB and Photoshop
Note before reading: This blog was written in 2018, when I was studying for my MA (hence the Harvard referencing!). Where needed, I have edited these posts to correct any factual inaccuracies. This post was last edited Jan 2025.
My work this trimester is a continuation of the work produced last term. I plan to develop the strongest swatches from this into prototype garments and accessories. Not wanting my work to get stale, however, I went back to my original primary research - photos of the Islay landscape and Brutalist architecture - to see if I could develop a new idea or two.
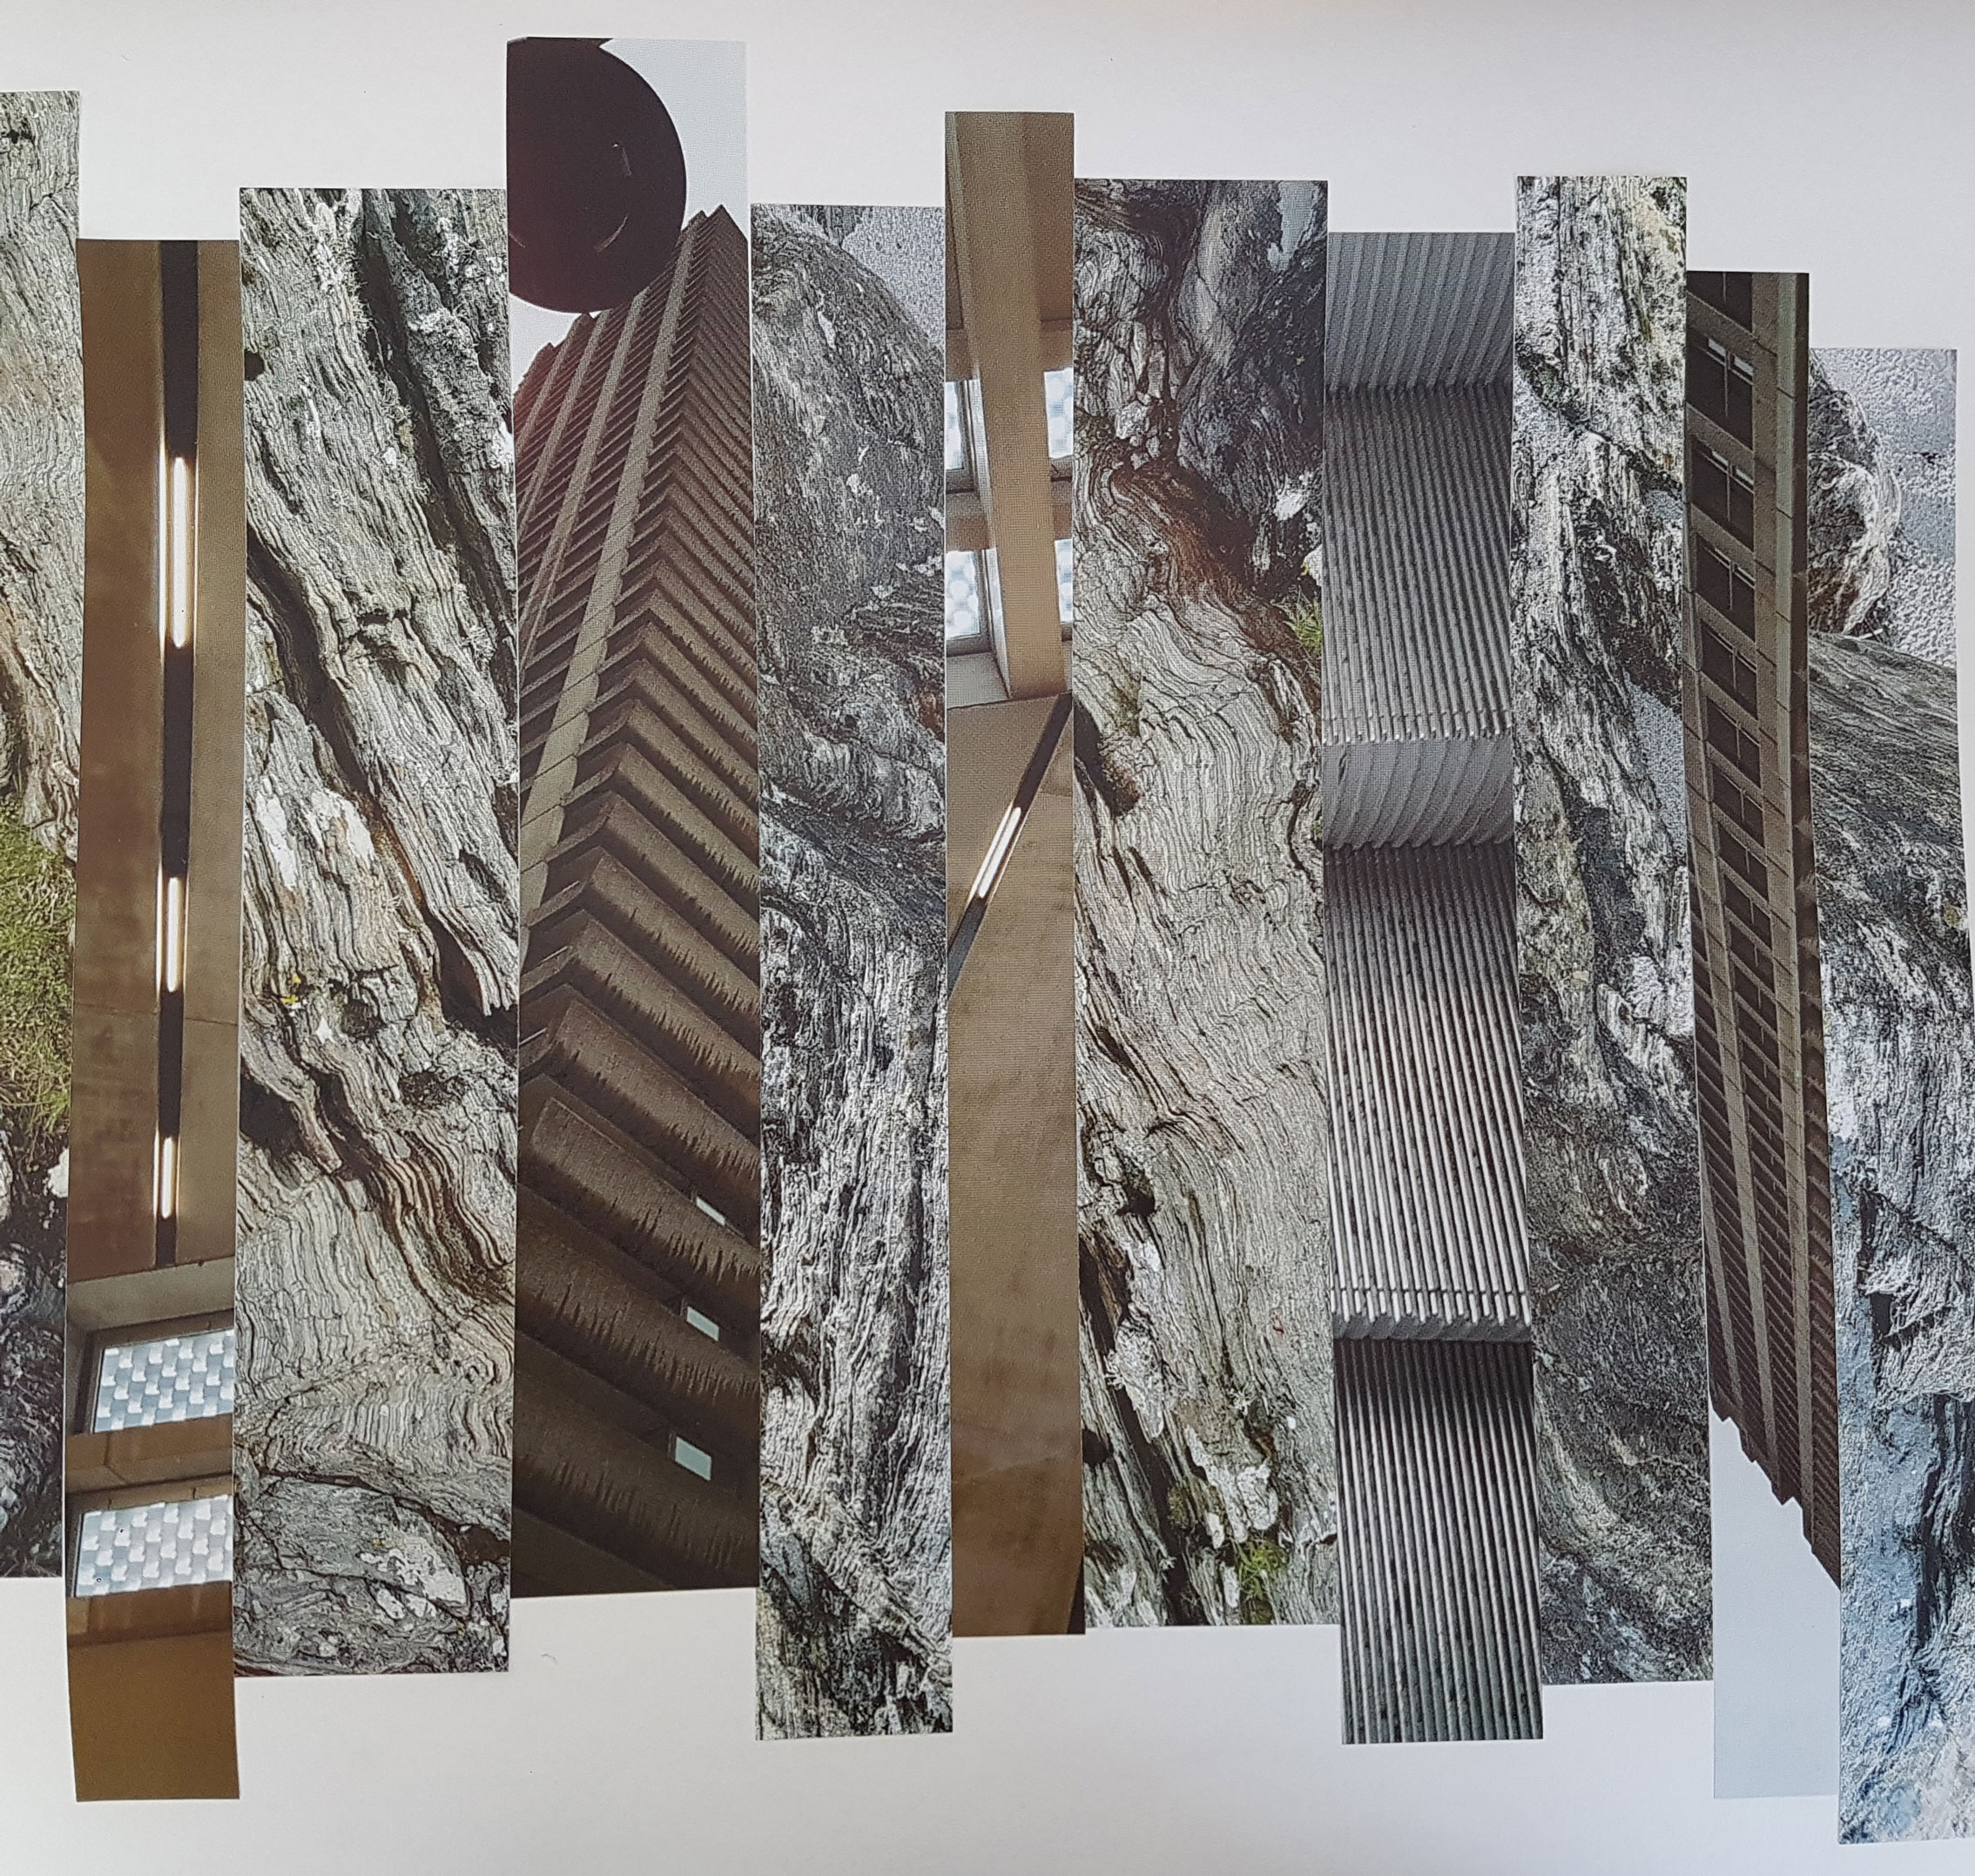
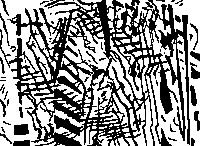
I printed the strongest images out onto A3 paper, and cut them into strips to make an abstract collage (images below). I was really pleased with the way these turned out, they give a strong effect and I think provide a good visual narrative for my project.

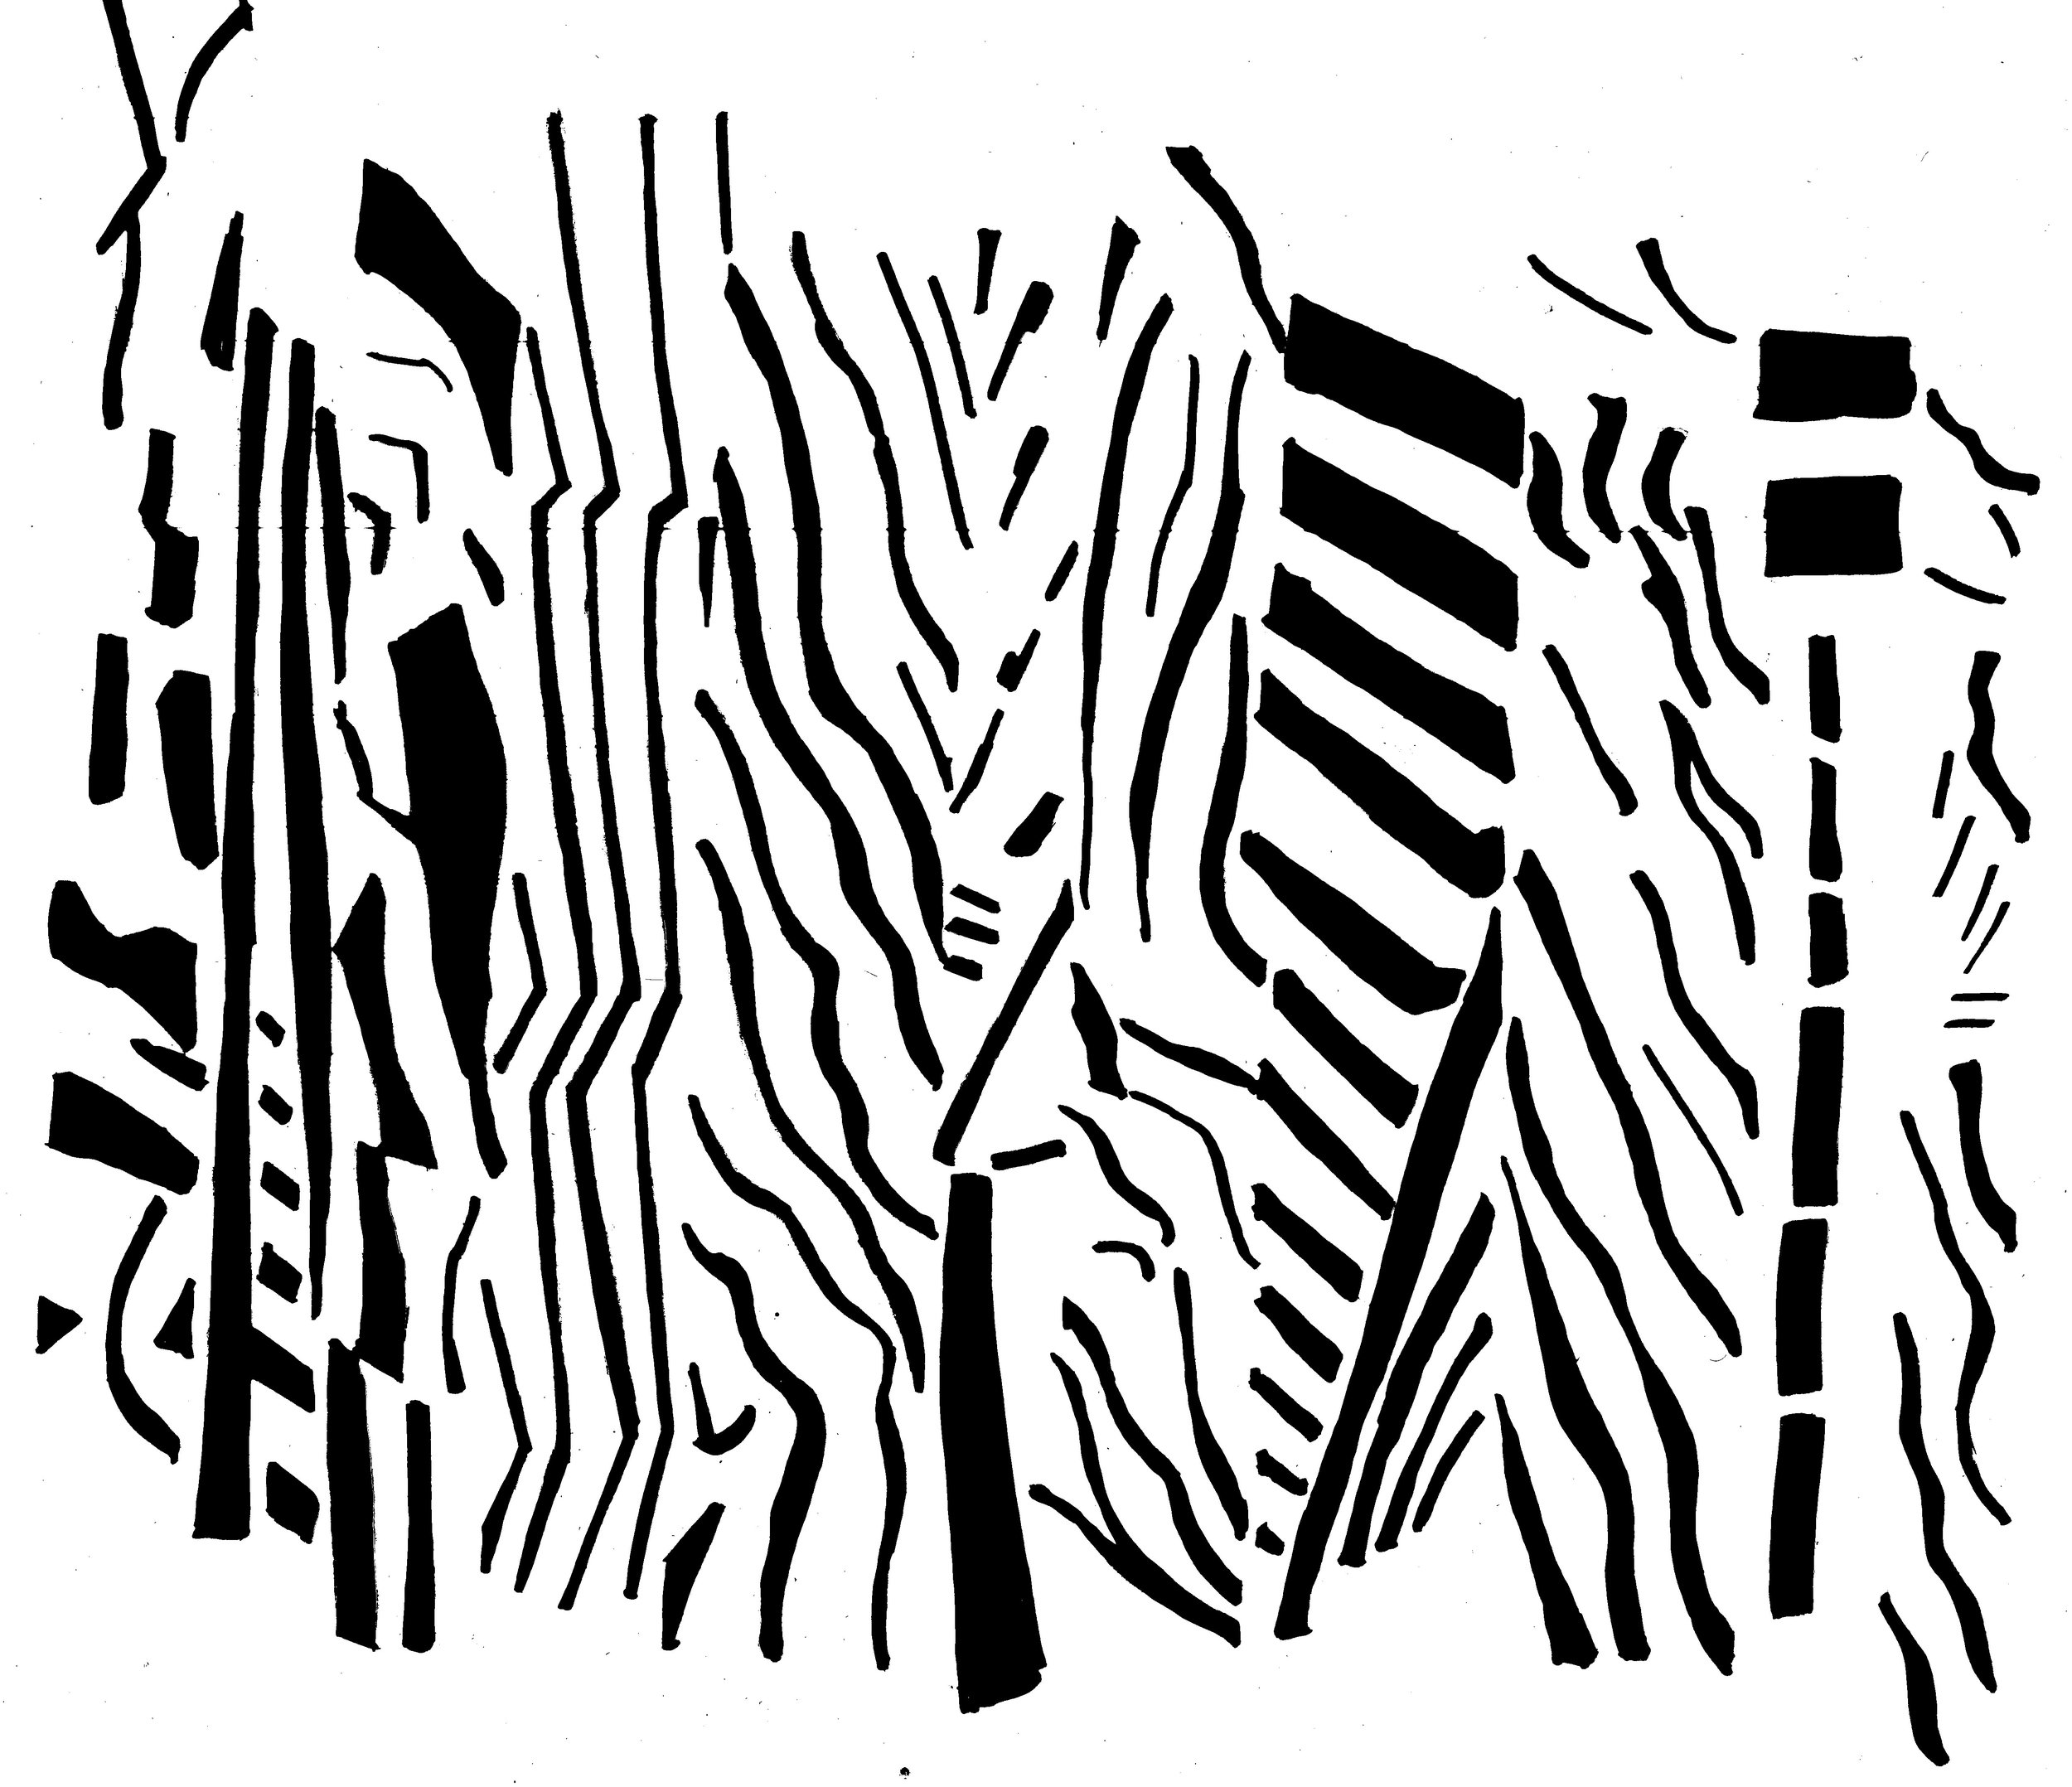
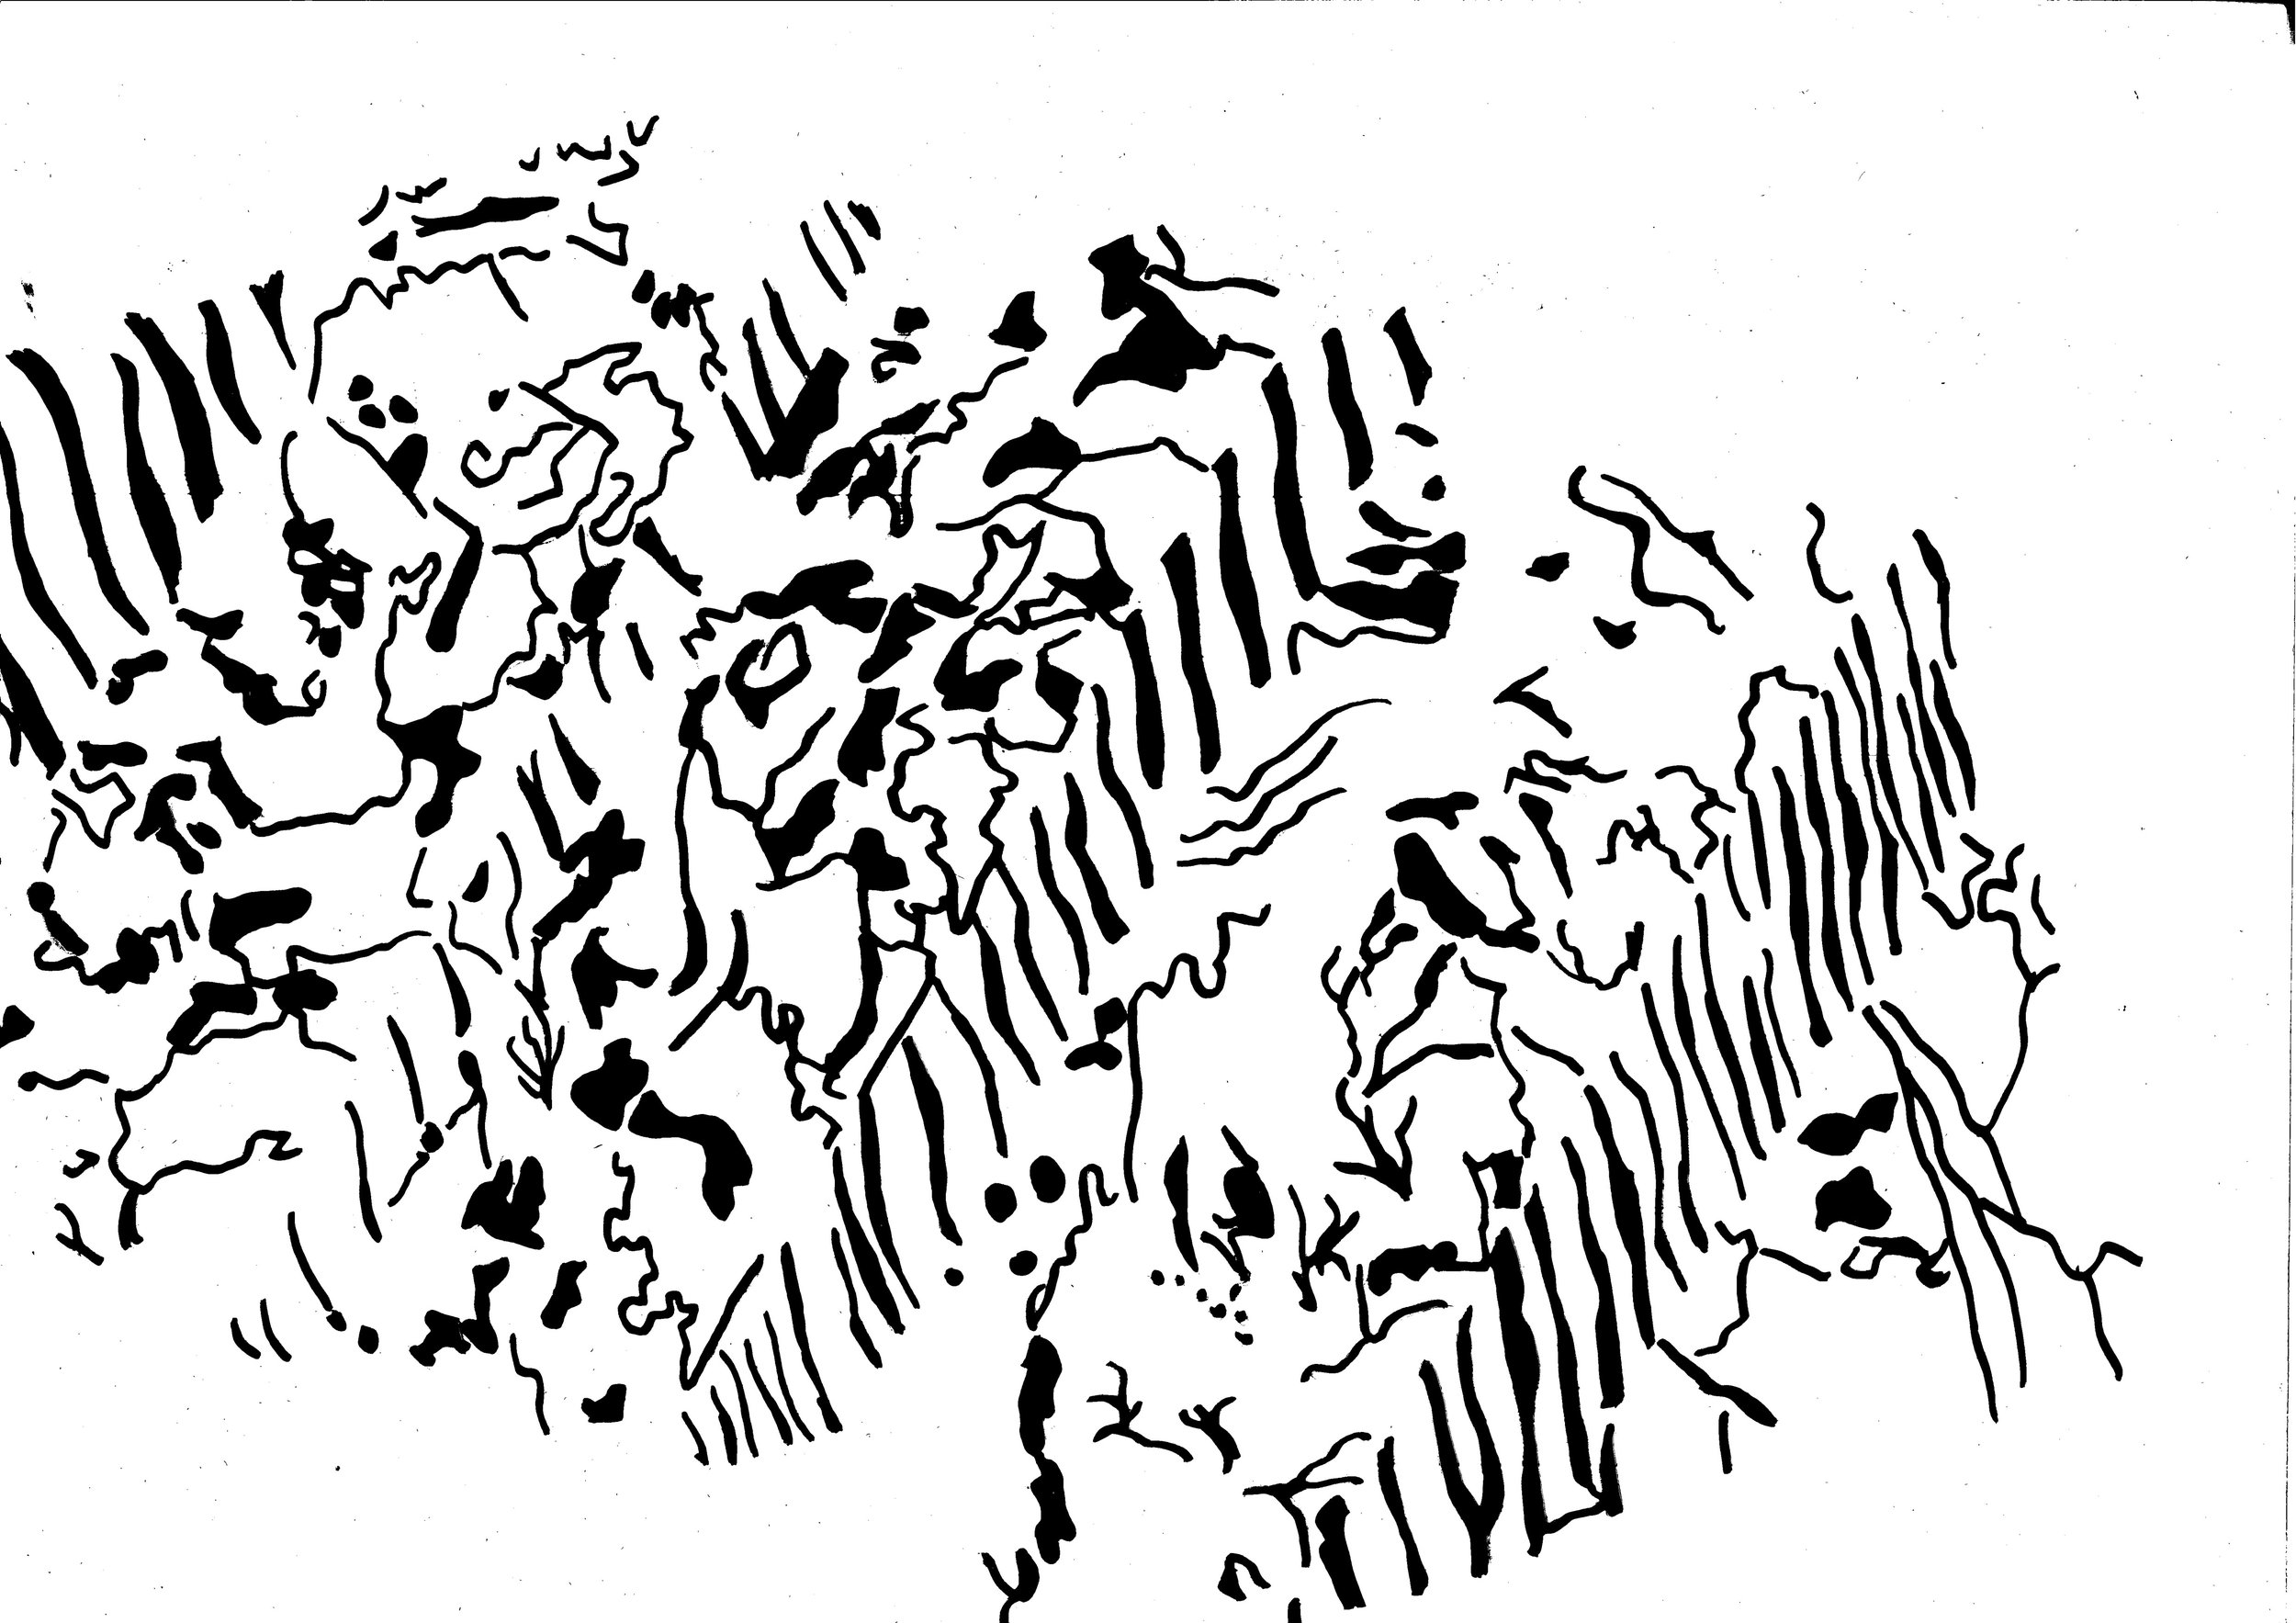
My next step was to lay a piece of tracing paper over the collages, and trace off the strongest lines and marks with a black marker. This helped to abstract the images further, into a graphic monochrome that I could already imaging turning into knitted stitches. Scanning these as a black and white image gave me a solid black and white file to work from. I also laid the two pieces of tracing paper over each other to create a more distorted image - this is the one I wanted to knit first, as it looked very different from the original source material.
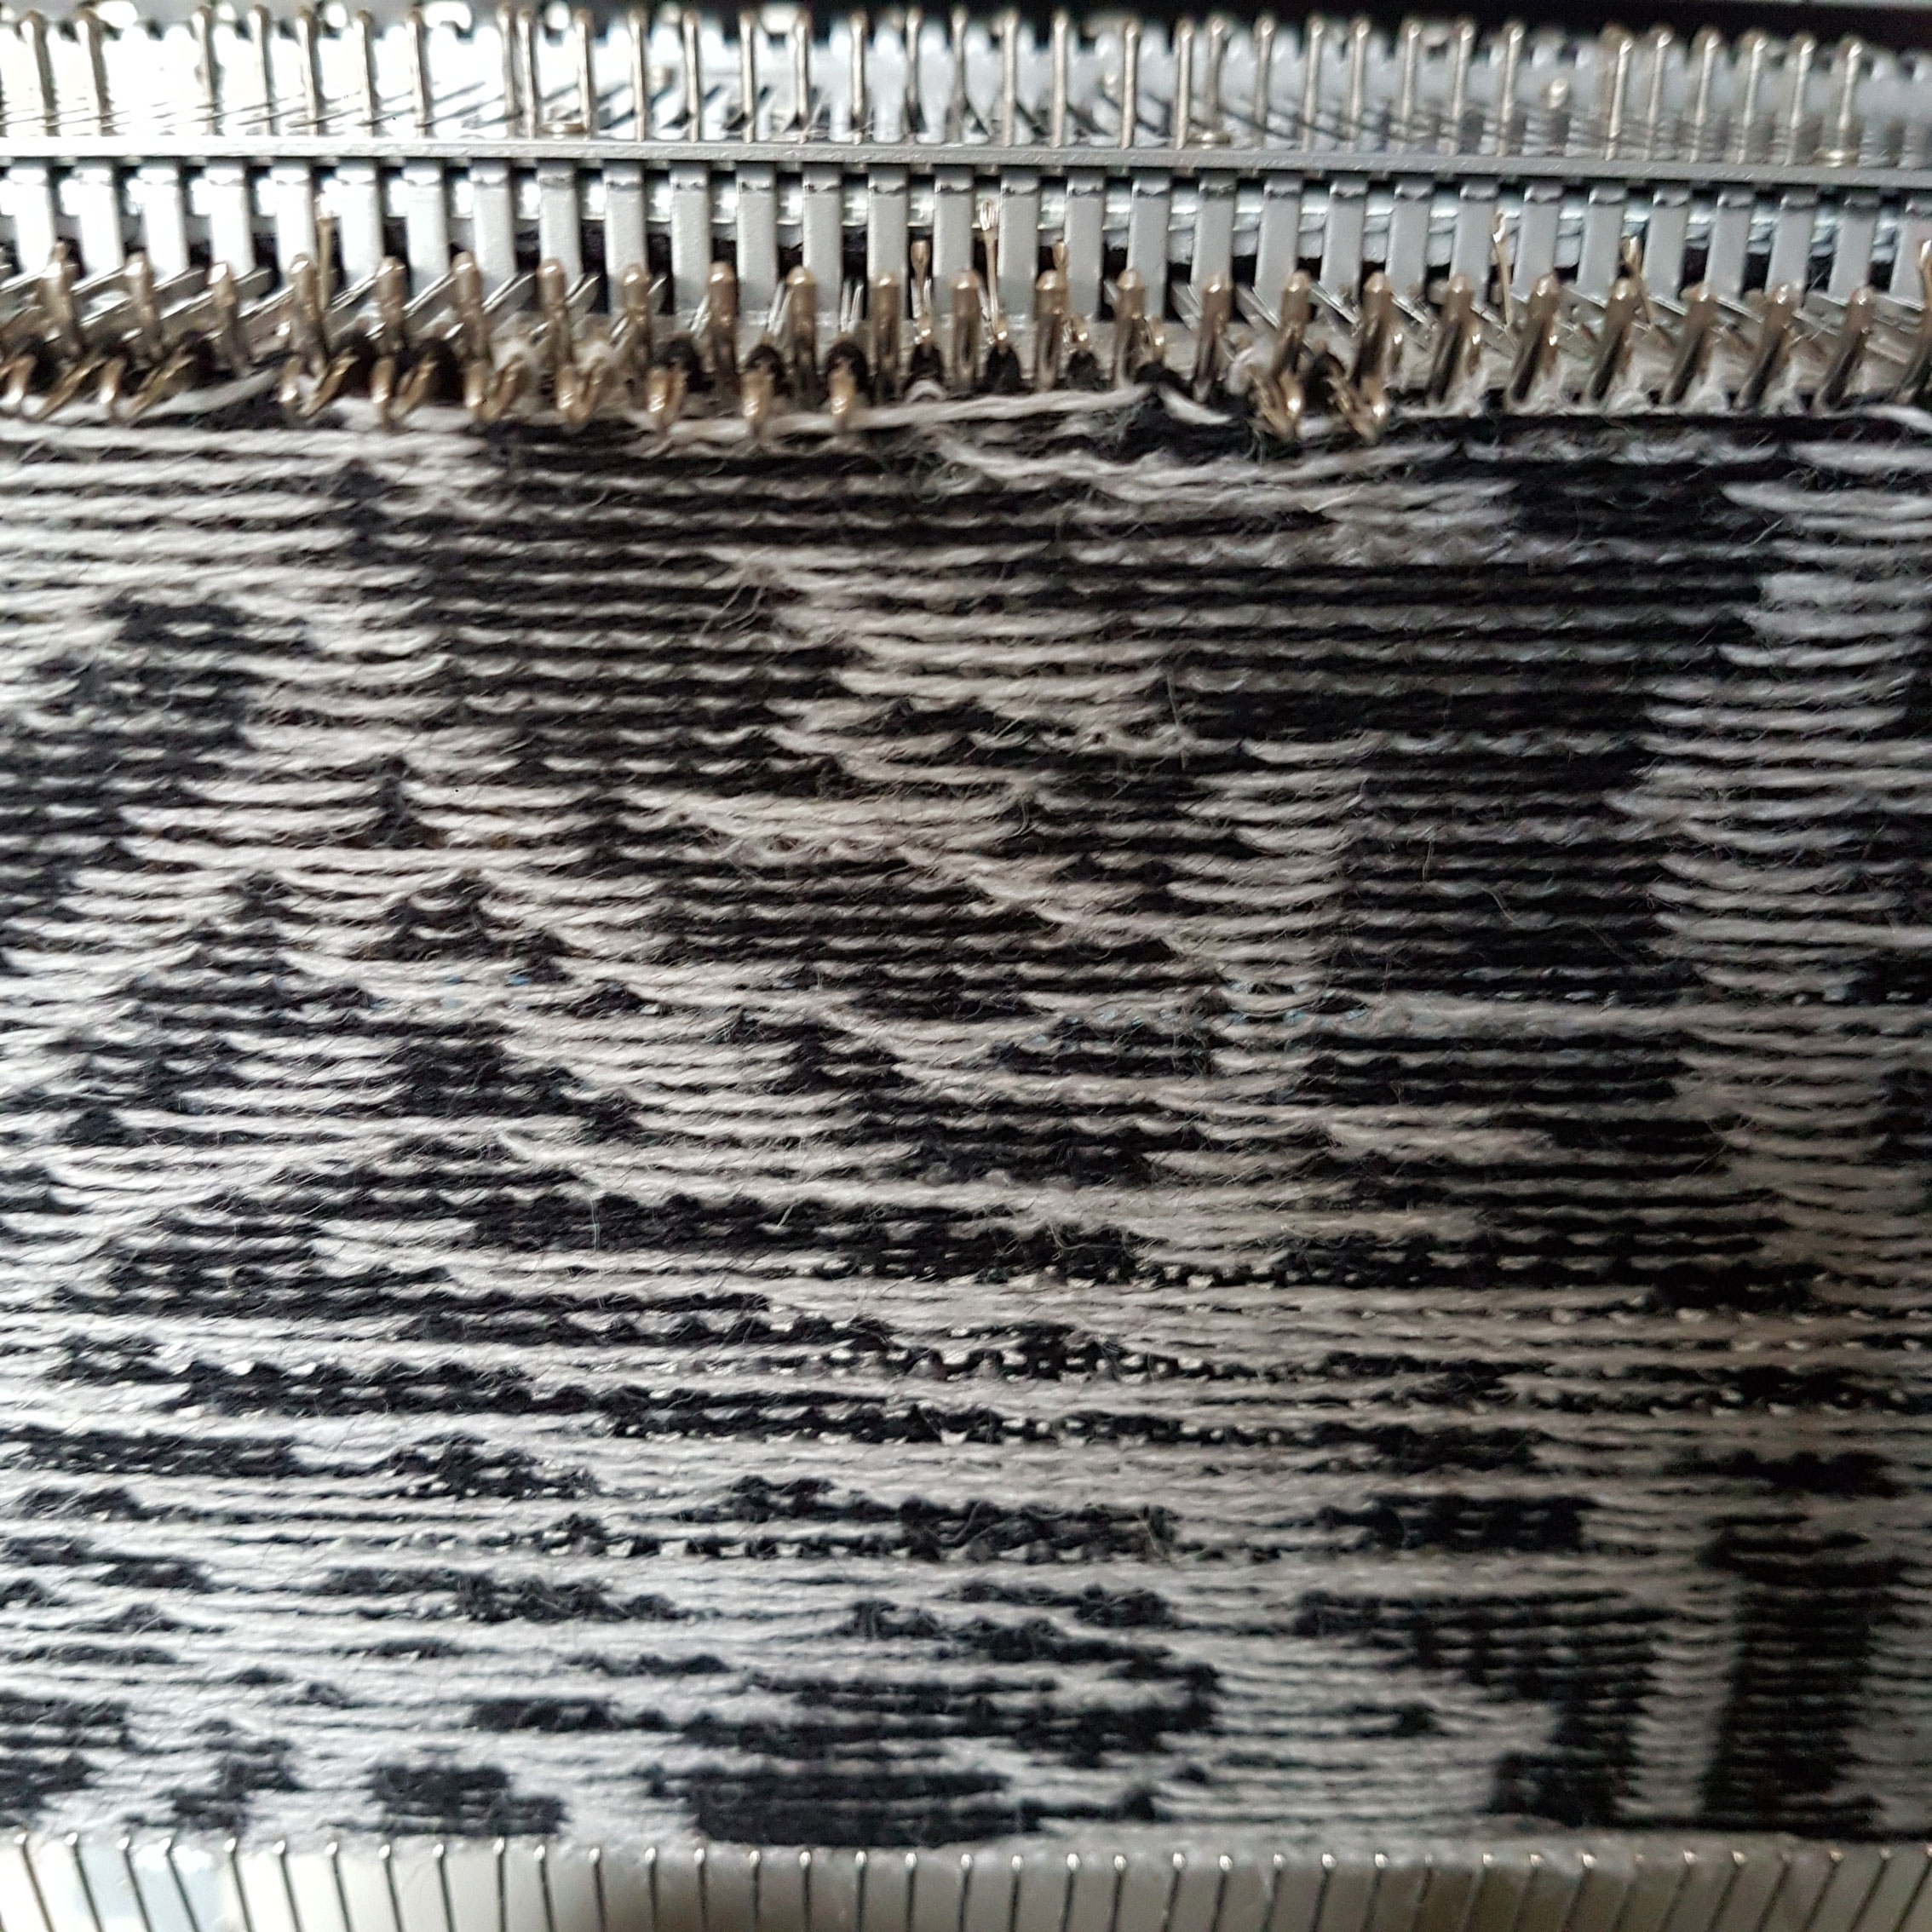
To get my electronic knitting programme to recognise the stitches, I had to turn the scanned image into a pixelated image, as per the method described in my earlier post. The image below is based on both collage/line sketches stacked on top of each other. The image was 200 stitches wide - the full bed of the knitting machine! It was a bit of an arm workout, and I had to be extra careful to check that AYAB (the computer programme) had processed each row of knitting to avoid errors. I knitted this in Uppingham Yarns British Wool in Grey and Black, making the swatch neutral to make it easier to spot potential problem areas of pattern, and visualise it in other colourways. I use this yarn for testing as it is available in the natural fleece colours and is affordable compared to using rare breed wool or my naturally dyed yarns.
The finished swatch (below left) feel like a bit of an assault on the eyes! Some sections are very busy, with lines from each drawing crossing each other, whereas some pieces resembled animal print. I love animal print, but it's not really the look I am going for! I think using both drawings at a right angle to each other made the design too complicated, so I repeated the process with the image created in Collage 3, as I felt that was the stronger outcome (below right).
You can see where the software glitched and reversed the colours on one row - I later found out that this is usually due to user error and knitting too fast! I will need to work a little bit slower in future. I could possibly isolate the more 'stripey' sections to work as a repeat pattern, and omit the more 'wiggly' lines. I think this has more potential than the first sample, but will get some valuable peer feedback in class to help me decide!
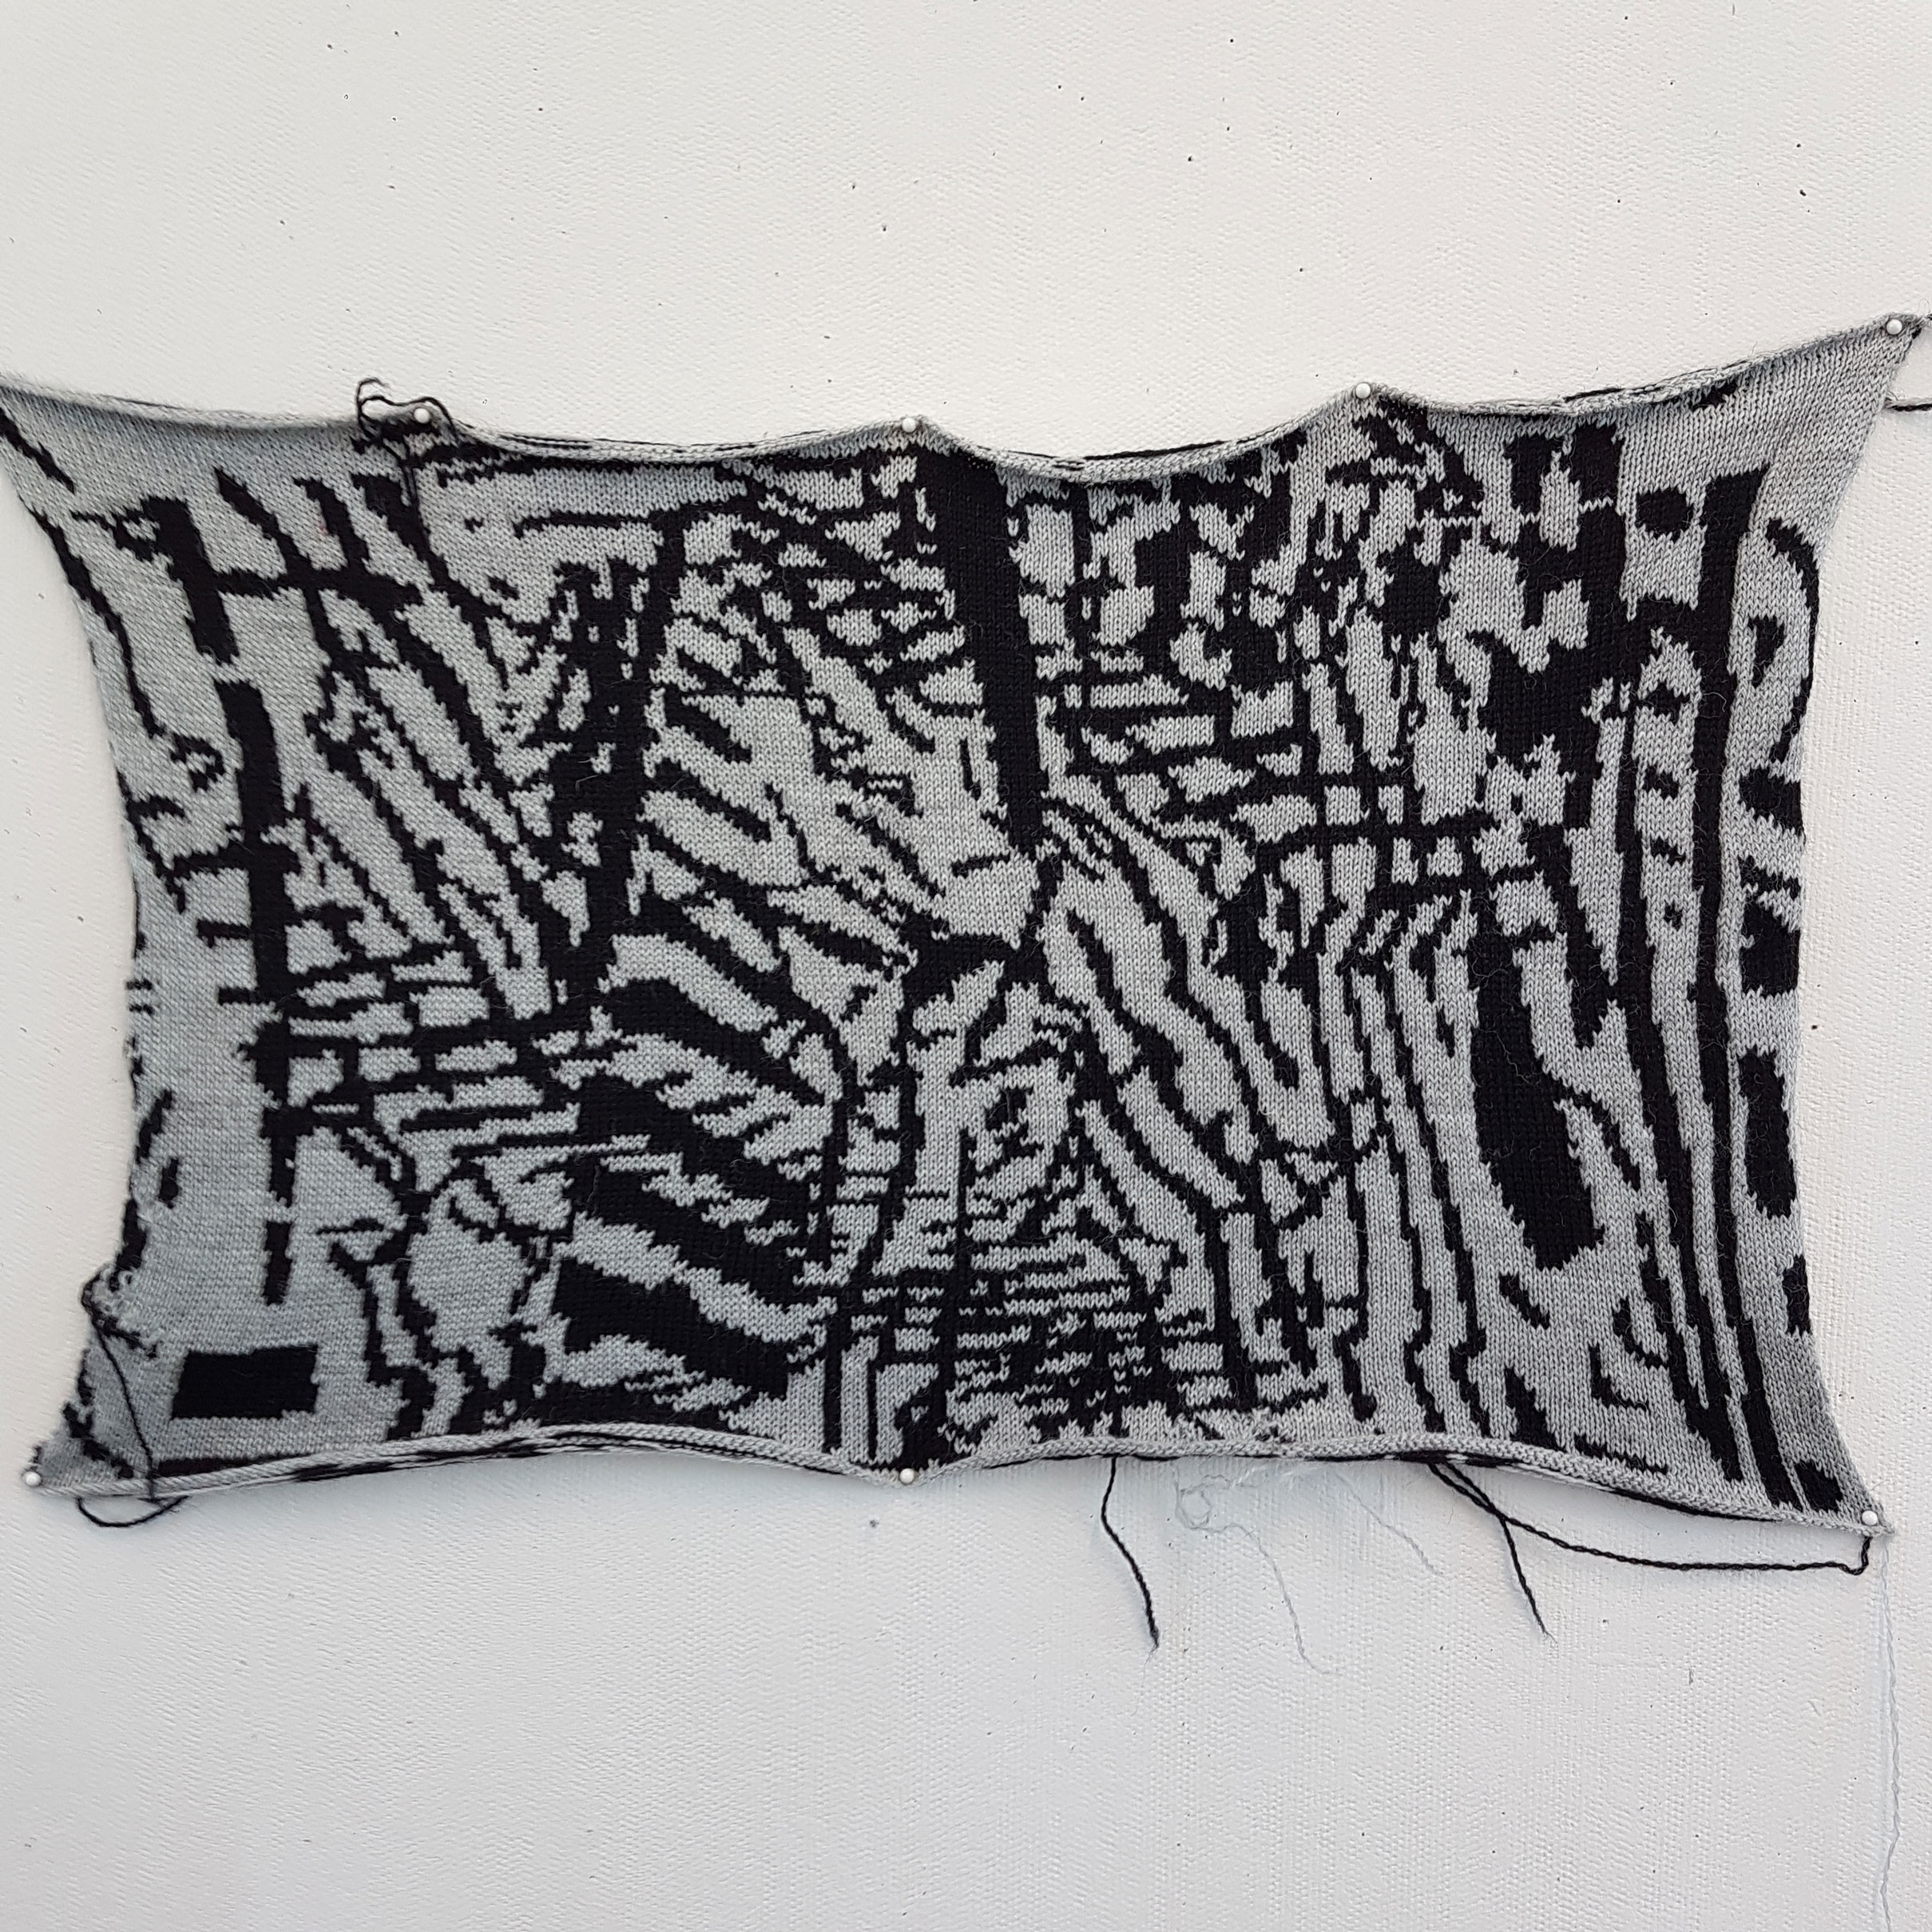
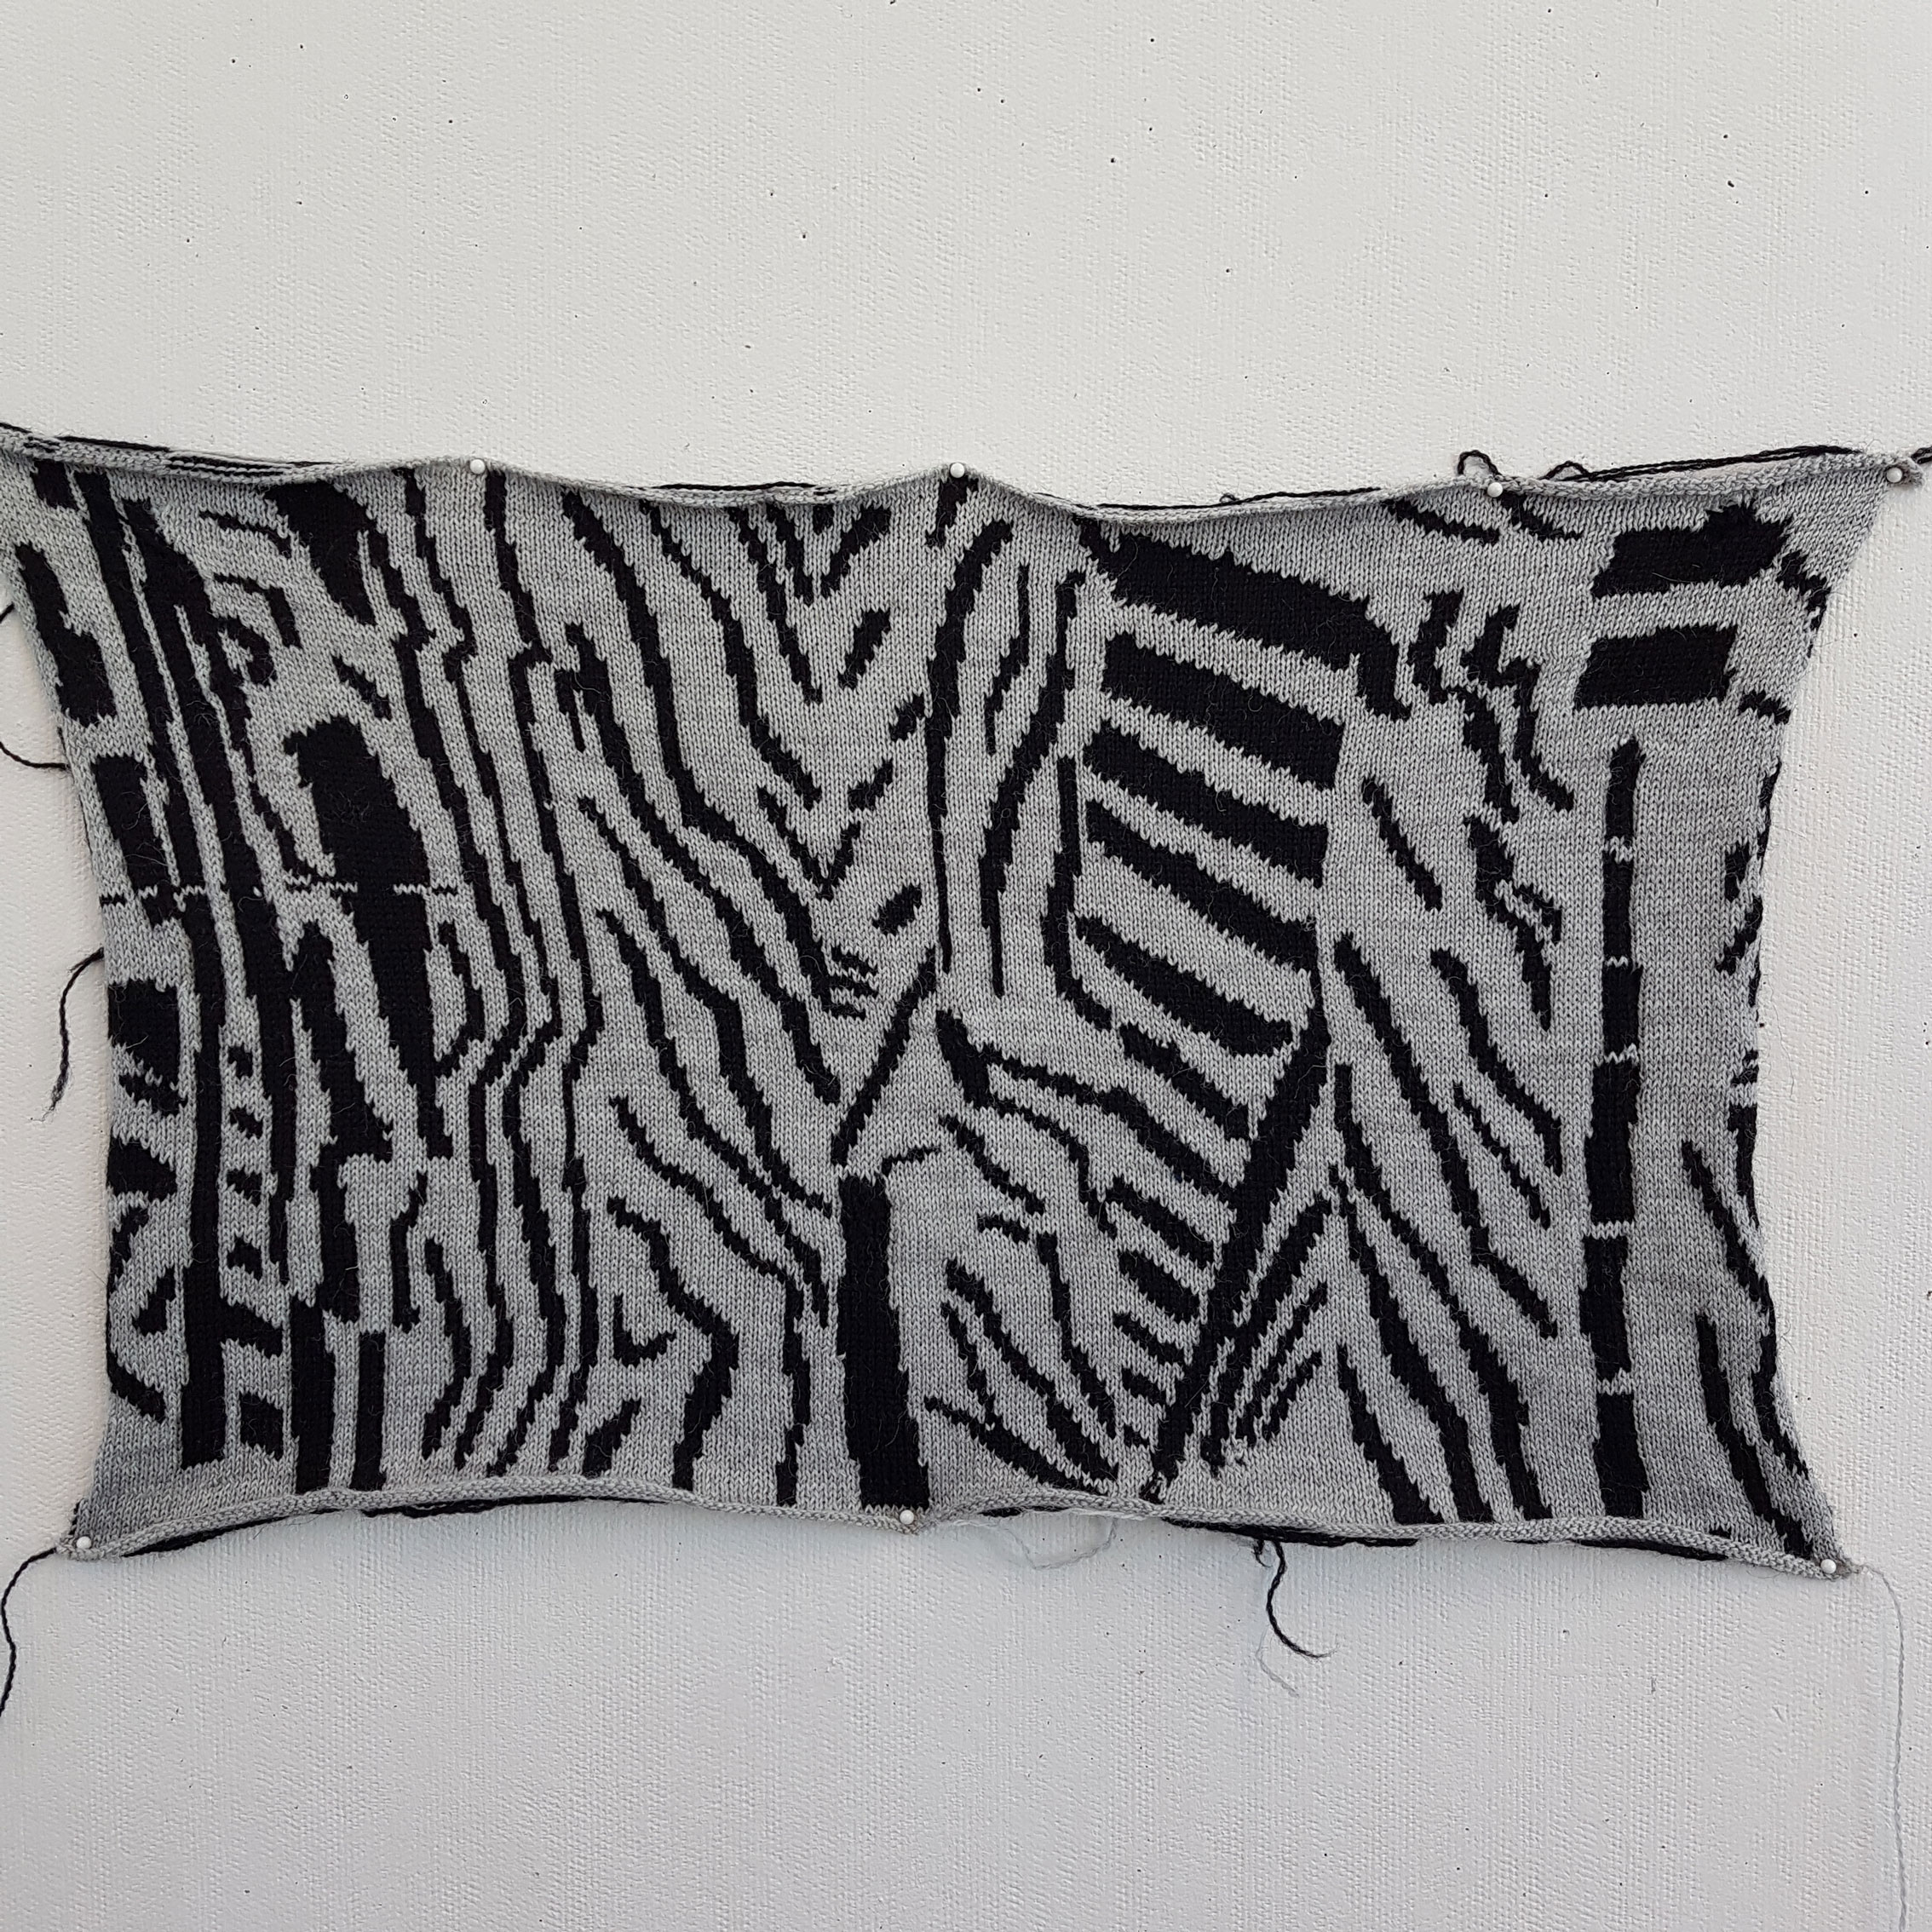
Both panels have large floats in the areas, where there are large patches of grey or black, and neither of them produce a repeat pattern. I do feel there is potential in the second panel I knitted, and so my next steps are to see if i can make a repeat pattern out of it, and then try and knit the design as a double bed jacquard. This utilises the ribber attachment and avoids the messy floats. Then, if I have a successful design, I will think about colourways and possible applications. The panels are 60cm wide, so perhaps it could make a striking blanket scarf?
References:
Burns, R. 2018. Collage 1-5. Photographs.
Burns, R. 2018. Monochrome Swatch 1-3. Photographs.